Registration forms – Getting started

Introduction
Registration forms
All information about attendees are collected through registration form. To start collecting information about your attendees, you have to create a registration form and add the fields you need.
Remember that registration forms need to be assigned to an invitation page to let attendees sign up for an event. We recommend to always have a separate registration forms for invitation pages and admin backend.
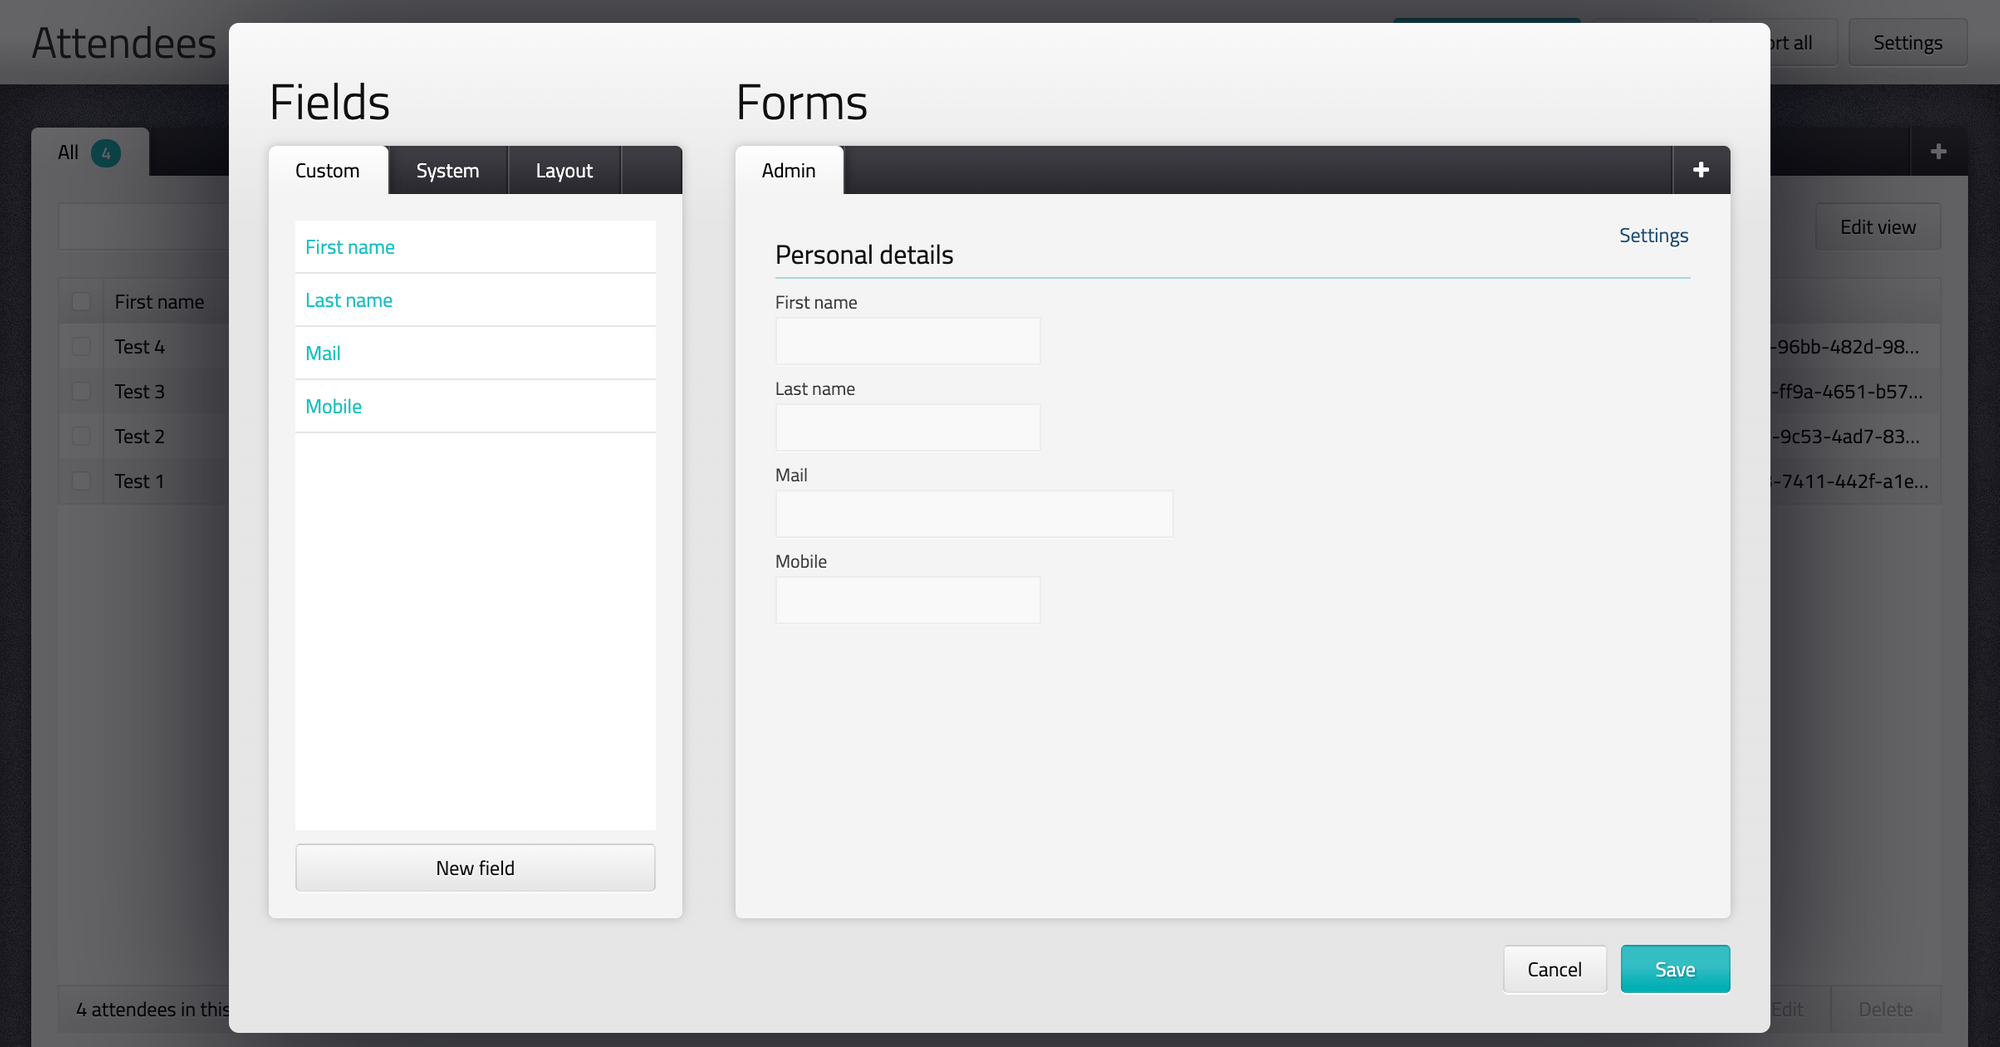
Create fields and registration forms
- Go to Attendees
- Click on "Settings" in the top right corner
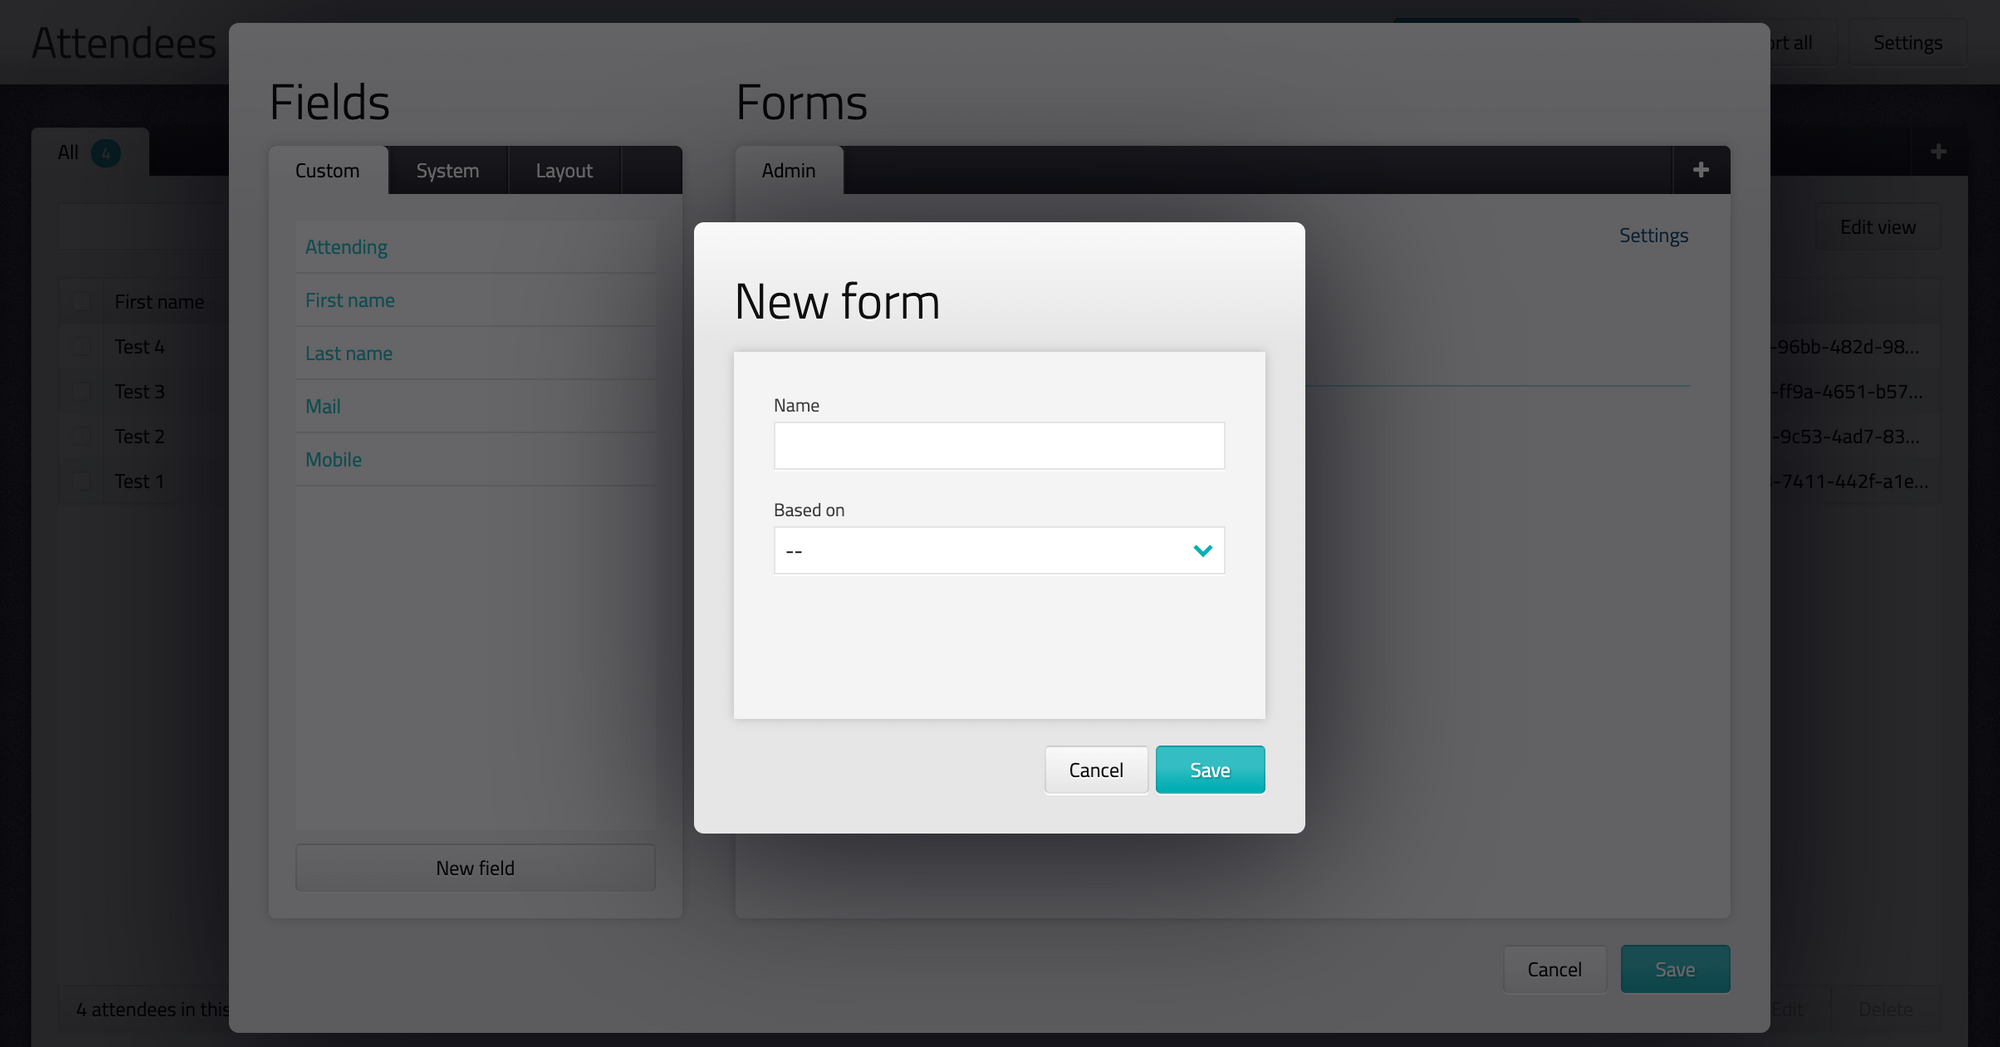
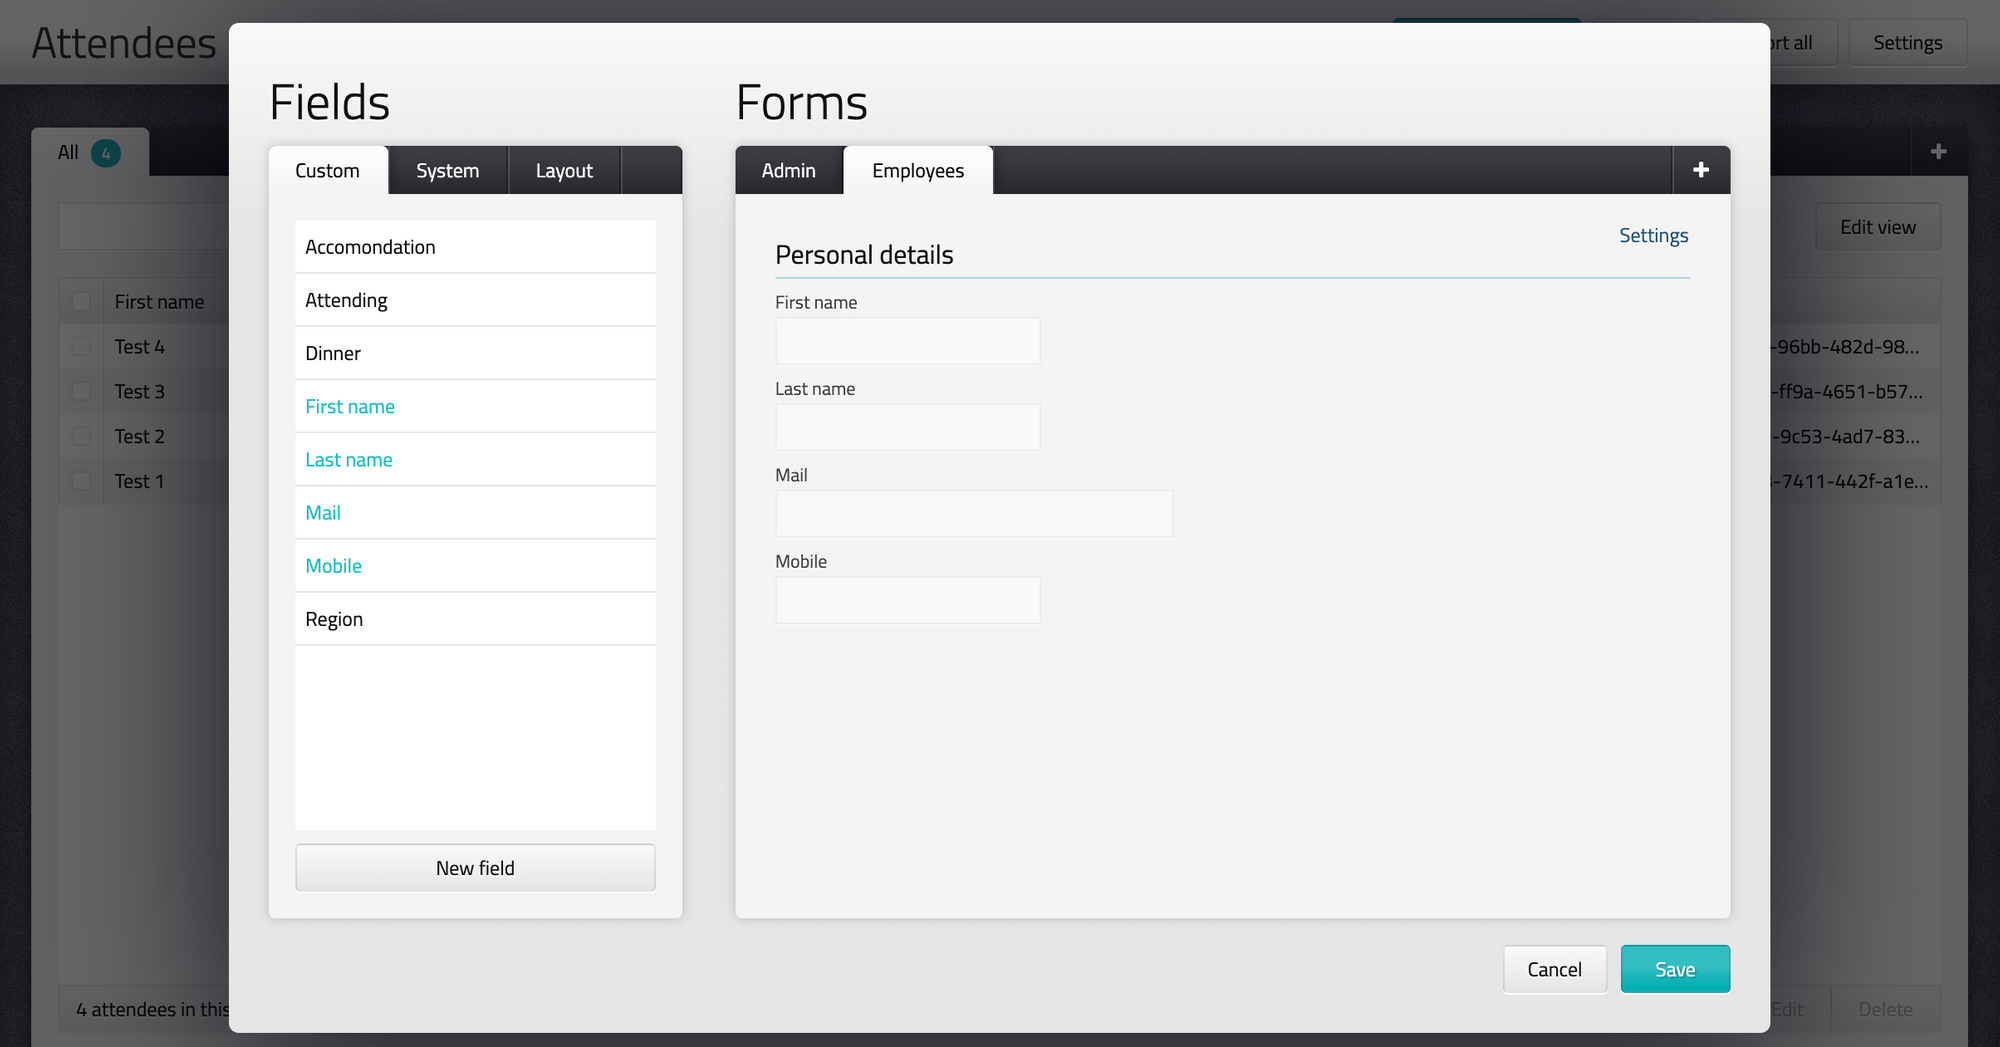
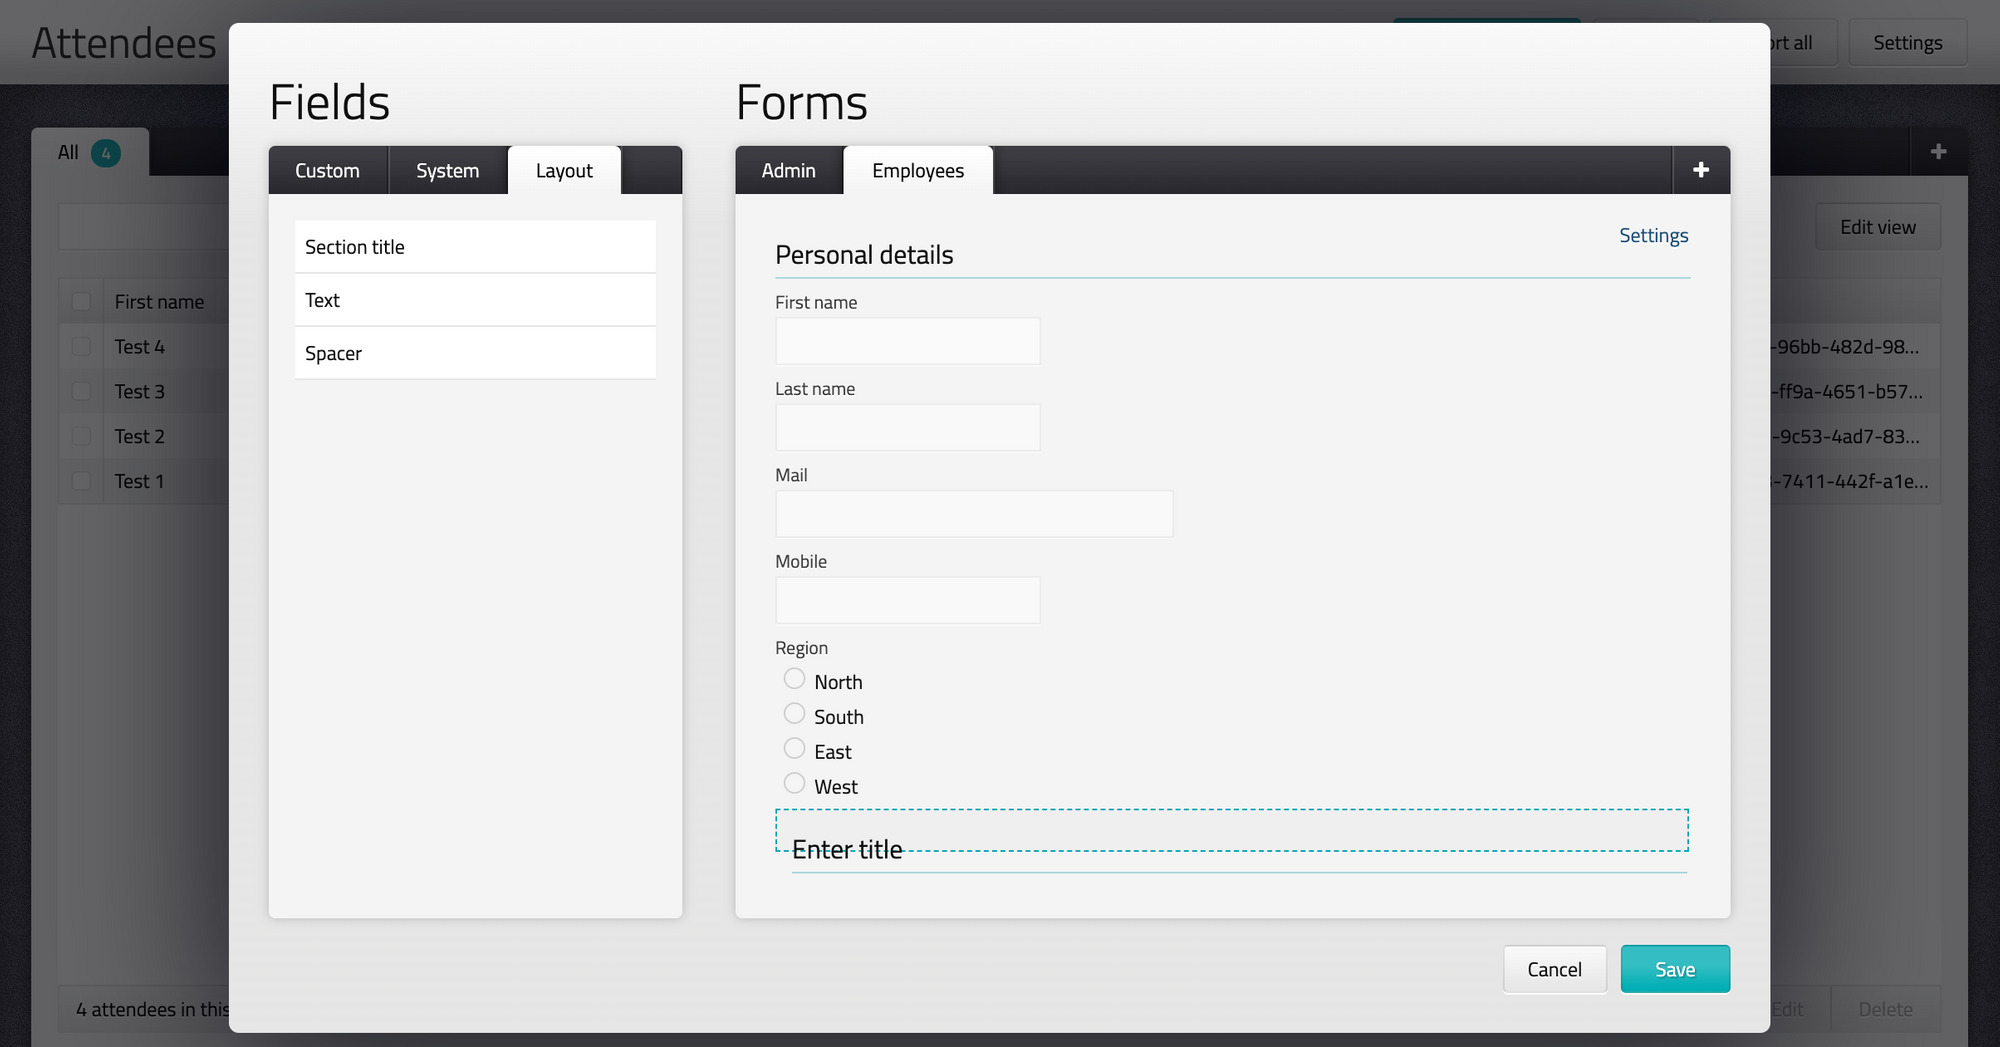
In the left section you will find all available fields that you can add to a form. In the right section you can see tabs with registration forms. - To create a new form, click on + in the top right corner and select a name ex. employees
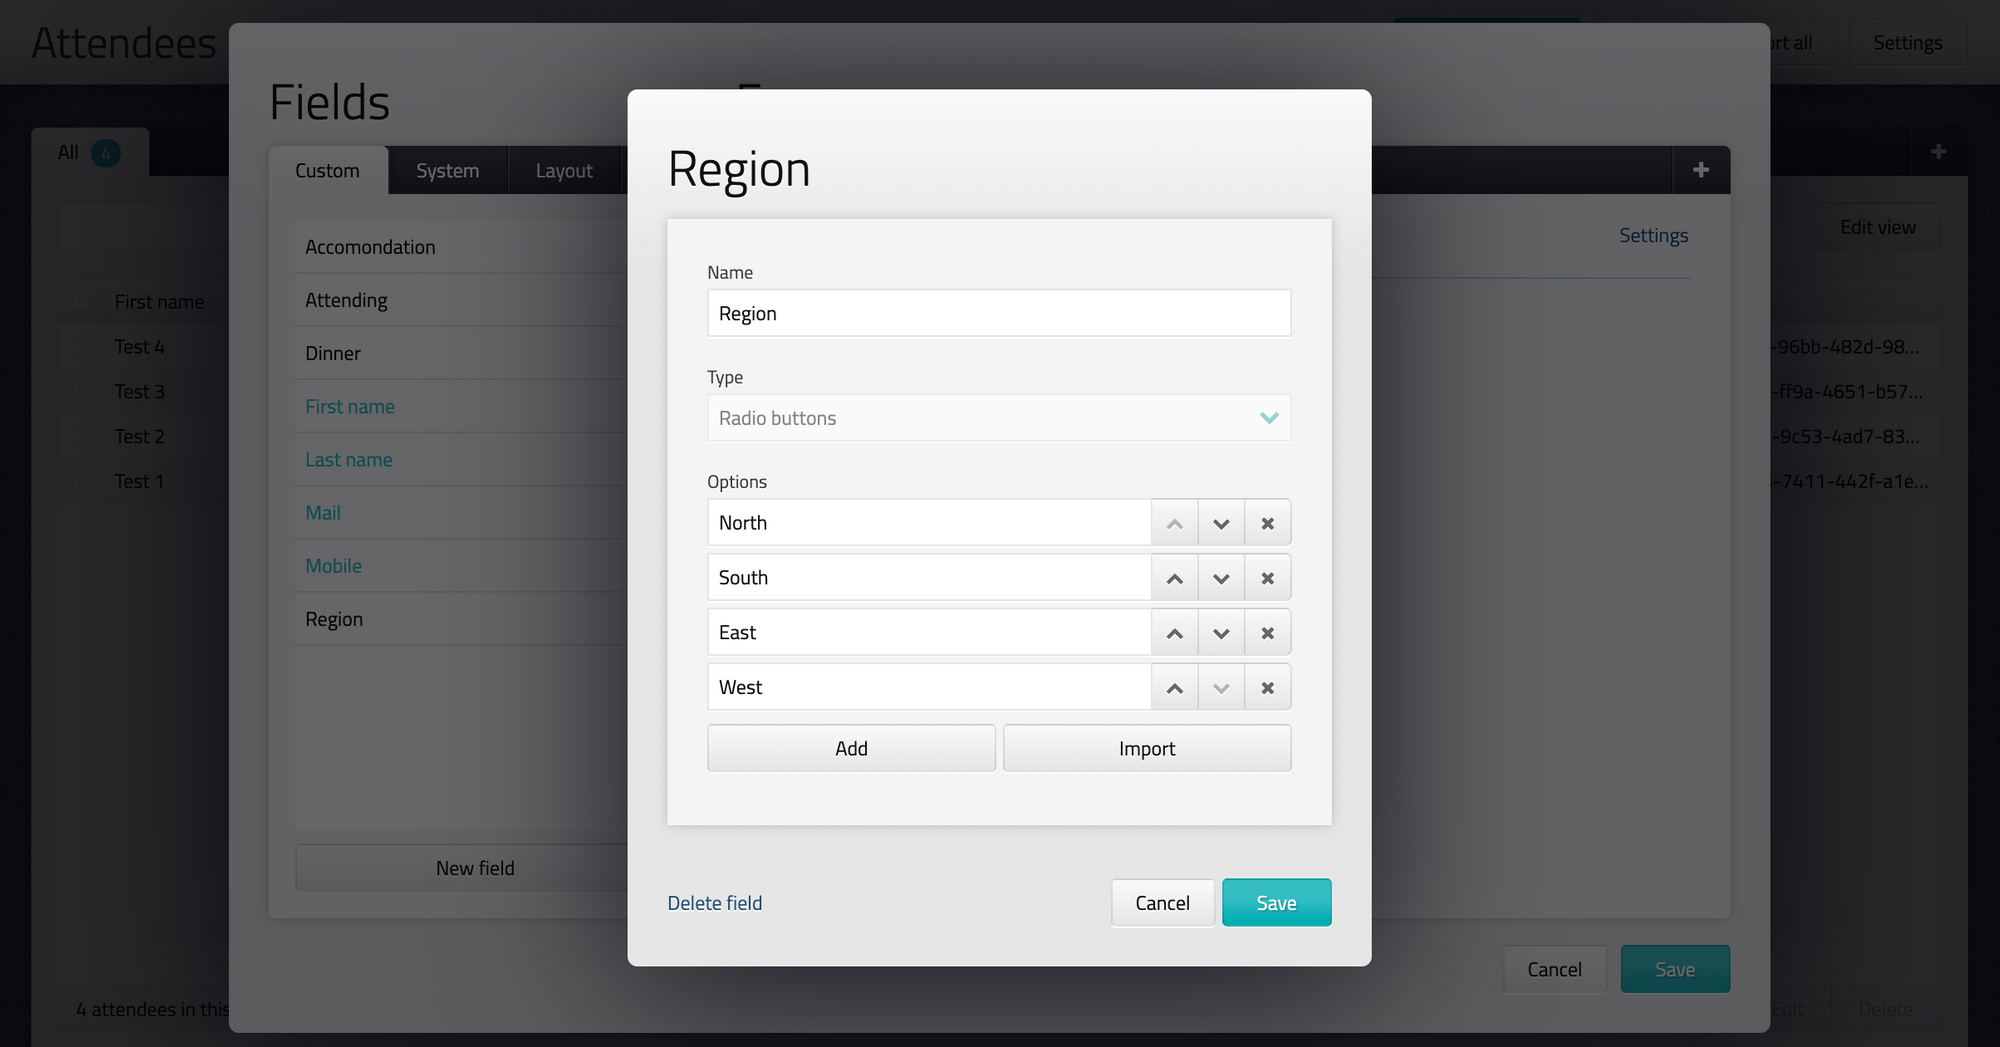
- To create a new field, click on "New field"
Single line text = One single line with text and/or numbers
Paragraph text = Multiple lines with text and/or numbers
Radio buttons = Radio buttons where attendees can select one value
Dropdown = Dropdown list where attendees can select one value
Checkboxes = Checkboxes where attendees can select multiple values (values are separated with comma on export)
It's always a good start to create a radio button with Attending = Yes / No in the Admin form.
Note that a field can be added to multiple forms so you can collect the same information from different registration forms. Ex. if you have different forms for employees and managers. - Create headings and add text to your form by selecting "Layout" and drag the field to selected form
- If you want to change text or delete fields, easily click on it
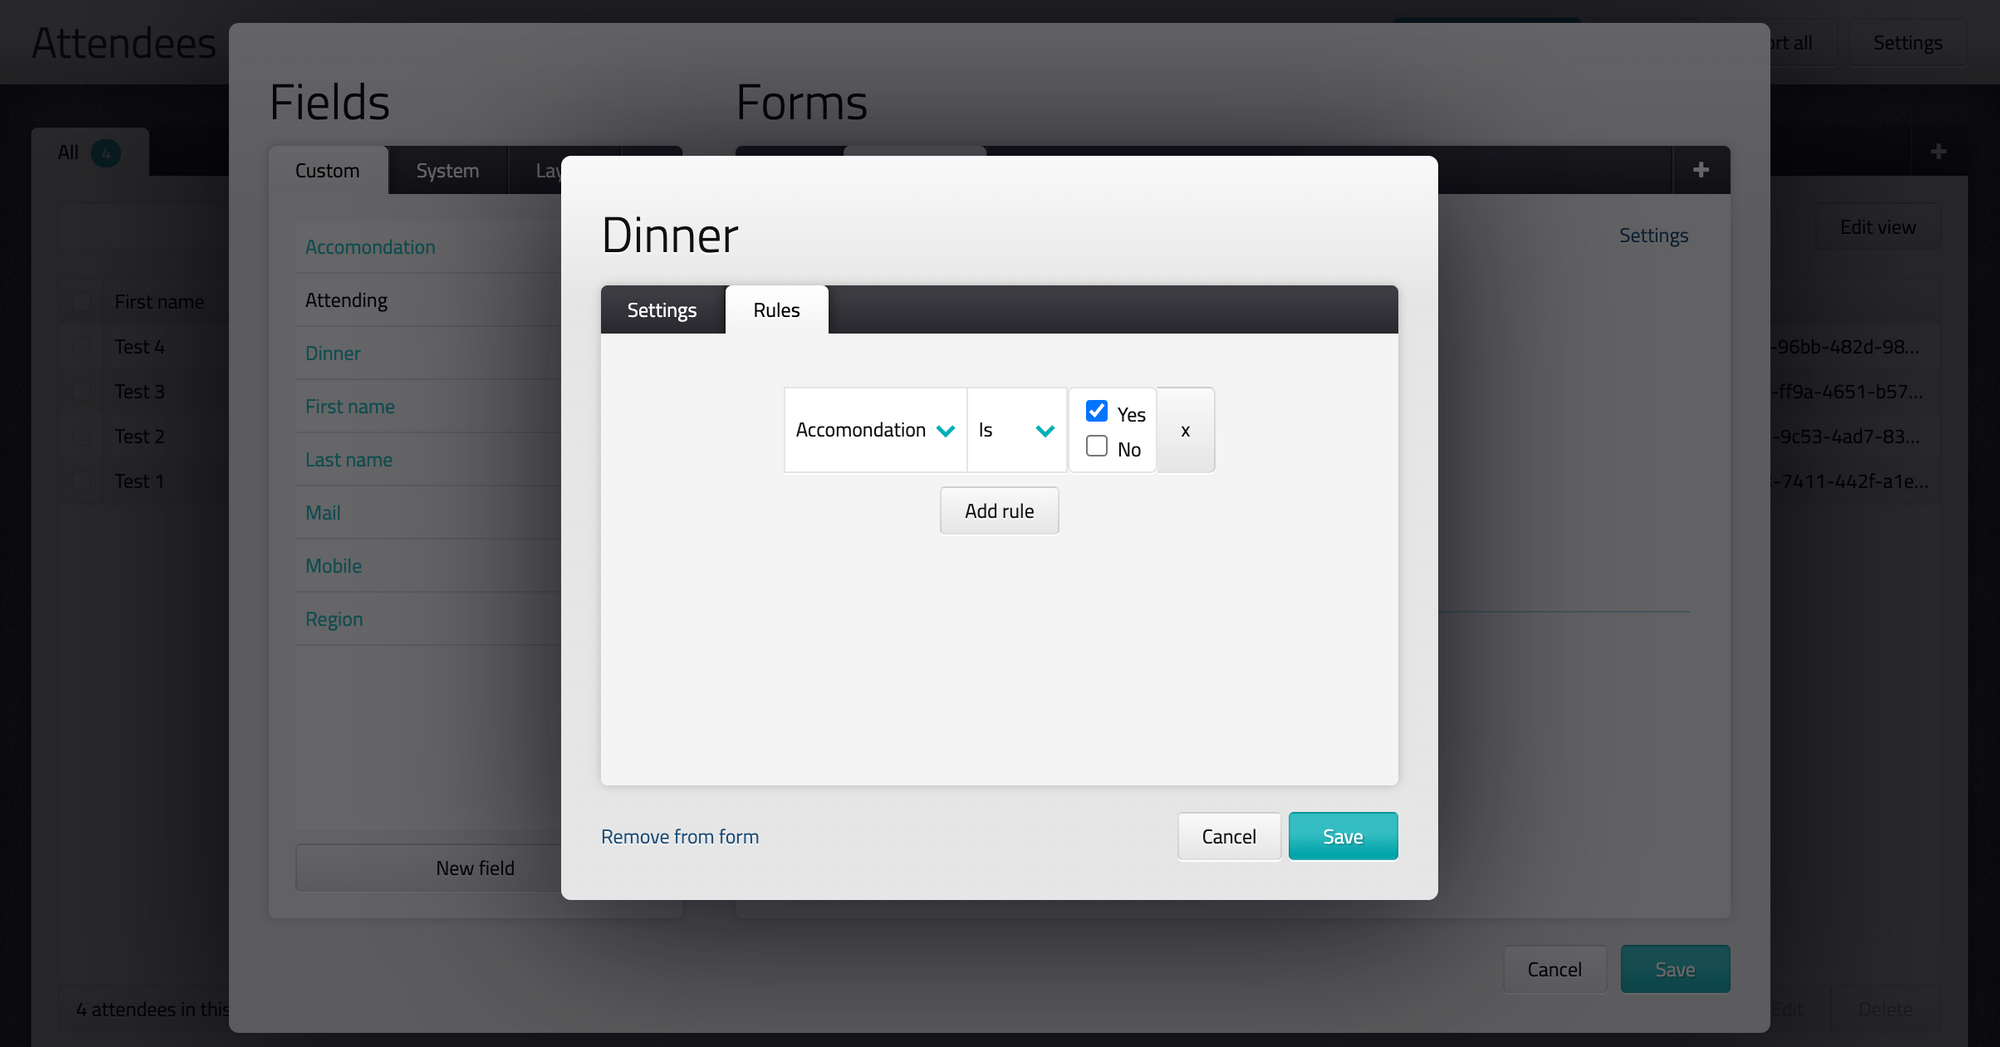
- To create a rule, click on the field in the right section that you want to hide or show based on another choice. Go to the "Rules" tab and add a rule.
Ex. if you want that only attendees who have selected accommodation, will get a question about dinner. - Remember to always click "Save" when you are finish